“Plug-and-play” endoscope cameras are usually easy to use—until they aren’t. The difference is almost always compatibility: your phone or computer needs the right USB/Wi-Fi path, the right adapter, and (often) a viewer app that can access the video feed.
Compatibility Checklist + Quick Fixes
If you want a truly “plug-and-play” experience, start by matching the camera type to your host device (Android/iPhone/iPad/PC) and verifying OTG/USB host + UVC + adapter + app flow before you buy.
| Your host device | Lowest-friction “plug-and-play” path (typical) | What to verify before buying |
|---|---|---|
| Android phone/tablet | USB endoscope + OTG-capable connection + UVC viewer app | USB host/OTG support, UVC support, data-capable adapter/cable, permission prompt behavior |
| iPhone | Often depends on the product/app ecosystem; Wi-Fi models are commonly simpler | Vendor explicitly supports iPhone + the required adapter/app; don’t assume USB endoscopes “just work” |
| iPad (USB-C models) | External UVC devices may work in compatible apps | iPadOS/app support for external camera + UVC conformity; power/adapter path |
| Windows PC | USB UVC camera often works with system driver | UVC compliance; USB port power/quality; camera shows up in camera apps |
| Mac | Many UVC cameras work, but app behavior can vary | UVC compliance + compatible camera app; USB permissions/settings if applicable |
Before you buy (fast checklist):
- Confirm your target host (Android / iPhone / iPad / Windows / Mac) and don’t rely on “supports all phones” claims.
- For Android USB endoscopes: verify USB host/OTG support and that the camera is UVC-compliant.
- Treat adapters as part of the system: prefer data-capable, well-made adapters (charge-only cables are a common failure).
- Assume you may need an app even if the listing says “no driver”—the app is often how you view UVC video on phones.
- If your top priority is “no surprises,” compare a Wi-Fi model vs USB model for your device.
If you get “no image” (fast fixes in the best order):
- Replug and try a different USB port/adapter/cable (eliminate charge-only and low-quality adapters first).
- Make sure you see (and accept) the USB permission prompt in your viewer app; try reopening the app after connecting.
- Try a different viewer app (UVC-capable) before assuming the hardware is dead.
- Test on a Windows PC if possible: if it works there, the camera is likely fine and the issue is phone-side (OTG/app/adapter).
- If the LEDs turn on but there’s no video, suspect app/UVC handling or a marginal adapter path.
What “Plug-and-Play” Really Means (and What It Doesn’t)
In this market, “plug-and-play” usually means you can connect the camera and view a live feed with minimal setup—not that it will work on every phone, or that you’ll never need an app.
Key points:
- “No driver” often means “uses a standard interface” (like UVC for USB video), especially on PCs.
- On phones, an app is commonly still needed to display the video feed and handle permissions.
- The same endoscope can work on a PC but fail on a phone if the phone doesn’t support USB host/OTG or the app can’t access the stream.
- “Plug-and-play” is more reliable when the camera follows common standards and the vendor clearly documents the supported devices.
Boundary conditions (read these before trusting a product listing):
- Compatibility depends on host OS/device behavior, adapter/cable quality, and the app workflow.
- iPhone support is frequently product-specific; verify before buying rather than assuming.
Compatibility Table: Android vs iPhone/iPad vs Windows/Mac
Most “plug-and-play” failures are compatibility mismatches, so a plain comparison table beats marketing claims. Use this to decide what’s realistic for your device before you focus on specs like resolution.

| Platform | What typically works (at a high level) | What to verify | Common pitfall |
|---|---|---|---|
| Android | USB endoscopes can work well when the phone supports USB host/OTG and the camera is UVC-compliant | OTG/USB host support, UVC compliance, viewer app permissions, data-capable adapter | “No image” because OTG is unsupported/disabled, or the adapter/cable is charge-only |
| iPhone | Often works best with models explicitly designed for iPhone (or with Wi-Fi endoscopes) | Vendor’s supported iPhone models, required adapter, required app, supported iOS versions | Buying a USB endoscope that was designed for Android/PC and expecting it to work on iPhone |
| iPad | iPadOS apps can support external cameras (often via standard capture APIs) | iPadOS/app support, UVC conformity, adapter/power path | Assuming all camera apps can select external devices; app capability varies |
| Windows | UVC devices often use the system-supplied driver | UVC compliance; device appears in Windows camera apps | USB extension/hub instability or insufficient power on marginal ports |
| Mac | Many UVC cameras work, but results vary by app and OS settings | UVC compliance; camera app compatibility | Assuming every app can access every camera; permissions and app support matter |
Boundary conditions:
- “Works with iPad” does not automatically mean “works with iPhone,” even within the Apple ecosystem.
- “UVC compliant” improves the odds, but it doesn’t guarantee every app will behave the same on every host.
- If the listing doesn’t name your exact device class (Android vs iPhone vs iPad vs PC), treat “plug-and-play” as “verify-first.”
Connector reality check: USB-C, Lightning, and “data-capable” adapters
If you see “not detected,” the adapter path is the fastest thing to eliminate—because it fails quietly.
Key points:
- Some cables are power-only (charge-only). They can power LEDs but carry no video data.
- USB hubs and long extensions can introduce marginal connections and power drops.
- “USB-C” and “Lightning” are connector types, not a guarantee of video device support.
Boundary conditions:
- Even good cameras can fail with poor adapters; test with a known-good adapter before returning hardware.
- If it works on PC but not on phone, the phone-side OTG/app path is the likely culprit.
OTG/USB Host + UVC: The Pre-Buy / Pre-Connect Checklist
For USB endoscope cameras, “plug-and-play” depends on whether your host can act as a USB host and whether the camera presents itself as a standard USB video device (UVC). If both line up, your setup becomes dramatically simpler.

Pre-buy / pre-connect checklist (copyable):
- Confirm your host type:
- Android phone/tablet: you need USB host/OTG support for USB endoscopes.
- PC/Mac: many USB video devices work best when they are UVC-compliant.
- iPhone/iPad: confirm the vendor’s supported setup; do not assume.
- Verify USB host/OTG (Android):
- The device should be able to power/enumerate connected USB devices in host mode.
- Verify UVC compliance (USB endoscope):
- Look for explicit “UVC” language in documentation, not just “works on PC.”
- Verify the adapter and cable path:
- Use a data-capable adapter/cable. If possible, test with a known-good OTG adapter.
- Verify the viewing method:
- On Android, you usually need a UVC-capable viewer app to request permission and display the stream.
- Verify the permission flow:
- “Plug-and-play” typically includes a USB permission prompt; if you never see one, treat it as a sign to re-check OTG/adapter/app.
What “UVC compliant” helps with (and what it doesn’t):
- Helps with: reducing the need for a proprietary driver on PCs, and improving the chance that standard camera software can see the device.
- Does not guarantee: image quality, stability on every phone, or support for special vendor features.
Boundary conditions:
- Some vendors bundle proprietary apps or firmware behaviors; even a UVC camera may work “better” with the recommended app on phones.
- Android device behavior can vary by manufacturer/OS settings, so verification on your exact device is best.
USB vs WiFi Endoscope Cameras: Which Is “More Plug-and-Play” for Your Use?
Neither USB nor Wi-Fi is universally “more plug-and-play”—the better choice is the one that reduces setup friction for your host device and inspection scenario.
| Option | Pros | Cons | Best fit |
|---|---|---|---|
| USB endoscope | Fewer moving parts (no Wi-Fi pairing); often stable on PCs; no battery to manage | Android requires OTG/USB host + app; adapters can fail; iPhone support is product-specific | Windows PC inspections; Android users who verified OTG + UVC |
| Wi-Fi endoscope | Often easier for iPhone users; avoids OTG/adapter surprises; works across more phone ecosystems when designed well | Adds pairing/network steps; can introduce latency; depends on the vendor app | Phone-first workflows, especially mixed iPhone/Android teams |
Scenario cues:
- If your main risk is “adapter/app confusion,” Wi-Fi models are often simpler—especially for iPhone users.
- If your main goal is “stable viewing on a laptop,” a UVC USB model is frequently straightforward.
- If you’ll deploy at scale, prefer the option you can validate across your exact target devices with a short test matrix.
How to Connect a USB Endoscope to Your Phone (Step-by-Step)
On Android, a USB endoscope usually becomes “plug-and-play” when you connect in the right order and use an app that can request USB permission and display UVC video.
Step-by-step (Android USB endoscope, typical flow):
- Close any camera/viewer apps that might already be open.
- Connect the endoscope to your phone using a data-capable USB-C OTG adapter (or the correct adapter for your phone).
- Open your endoscope viewer app (or a UVC-capable USB camera viewer app).
- Replug the endoscope (if needed) and watch for a USB permission prompt.
- Approve the permission request and choose the USB camera device when prompted.
- Start the live preview; adjust LED brightness and focus distance by moving the tip closer/farther (many probes are fixed-focus).
- Capture photos/video using the app’s record controls.
If you don’t see a permission prompt:
- Try a different adapter/cable first (charge-only cables and weak adapters are common).
- Check that your device supports USB host/OTG and that it’s enabled if your phone has a toggle.
- Try a different viewer app to rule out app-side limitations.
Boundary conditions:
- Exact UI steps vary by app and Android version, but the “connect → permission → select device → preview” pattern is common.
- If the camera works on a PC but not on your phone, focus troubleshooting on OTG/adapter/app rather than the camera itself.
No Image / Not Detected: Fast Troubleshooting Decision Tree
When you see a black screen or “not detected,” the fastest troubleshooting order is host support → adapter path → app/permission → camera behavior.

Start here (choose the symptom that matches you):
- If you get no permission prompt on Android:
- Try a different data-capable OTG adapter/cable.
- Confirm USB host/OTG is supported (and enabled if your device has a setting).
- Try a different UVC-capable viewer app.
- Test the camera on a PC; if it works there, the camera is likely fine.
- If the LEDs turn on but there’s no video:
- Suspect the data path (charge-only cable/adapter) or app-side UVC handling.
- Swap adapter/cable and try a second app.
- Avoid hubs/extensions during testing.
- If it connects then disconnects / freezes:
- Remove hubs/extensions and plug directly.
- Try a different USB port (on PC) or a different adapter (on phone).
- Reduce strain on the connector; wiggly connections can look like “software issues.”
- If the app says “UVC not supported”:
- Treat it as either (a) the camera isn’t presenting as UVC, or (b) the app can’t handle the stream on that device.
- Try a different viewer app.
- Test on Windows: if Windows sees it as a camera, the device is likely UVC and the issue is phone/app-specific.
- If it works on PC but not on your phone:
- Focus on Android OTG/USB host support and adapter quality, or choose a Wi-Fi model for phone-first use cases.
Boundary conditions:
- Some combinations are genuinely device-specific; testing on a second phone or a PC is the fastest way to separate “camera problem” from “host problem.”
- If you need iPhone reliability and can’t validate the exact setup, prioritize models explicitly designed and documented for iPhone.
Which App Should You Use? (Universal Viewers vs Vendor Apps)
A “universal” viewer app can be convenient for UVC cameras, but vendor apps may be required for certain models or special features. The best choice is the one that reliably shows video on your device with minimal friction.
How to choose (practical criteria):
- Start with the vendor’s recommended app if the product documentation is clear and your device is explicitly supported.
- If the device is UVC-compliant and you want flexibility, try a reputable UVC-capable USB camera viewer app on Android.
- Prefer apps that clearly explain the USB permission flow and device selection behavior.
- If you need extra features (overlays, special controls, Wi-Fi pairing), vendor apps are more likely to support them.
Permission and privacy note (non-alarmist, but real):
- A camera viewer app needs camera/video access by design; install only from trusted app stores and review permissions and reviews.
Boundary conditions:
- “Universal” apps may show video but skip vendor-specific controls.
- App behavior can vary by Android manufacturer and OS version, so keep a backup app option.
Specs That Actually Matter for Inspection Clarity (Beyond “1080P/2K”)
Resolution is rarely the limiting factor in real inspections—working distance (focus), lighting, and field of view usually decide whether you can actually see what you need.

Specs-to-outcome mini-table:
| Spec (what to look for) | Why it matters in real inspections | Common mistake |
|---|---|---|
| Working distance / focus behavior | Determines whether “close-up” details are sharp or blurry | Buying a camera that can’t focus at your typical inspection distance |
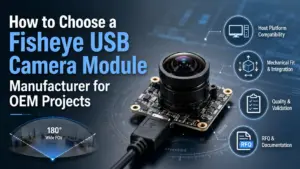
| Field of view (FOV) | Wider FOV shows more area but can reduce detail and distort edges | Choosing the widest FOV and then struggling to identify small defects |
| LED brightness control | Controls visibility in dark cavities and glare on reflective surfaces | Maximum LEDs/brightness causing washout and reflections |
| Probe diameter | Decides what spaces you can physically enter | Ignoring diameter until after purchase and finding it won’t fit |
| Cable stiffness (semi-rigid vs soft) | Determines steering/control in bends | Choosing a very long/soft cable and being unable to aim the tip |
Practical tips (quality without hype):
- If your image is blurry up close, it’s often a focus distance mismatch, not “bad resolution.”
- For reflective surfaces (metal pipes, engine bays), adjustable LED brightness matters as much as pixels.
- A smaller probe can reach more places, but you still need enough stiffness to aim it.
Boundary conditions:
- The “best” spec set depends on your typical working distance, materials (reflective vs matte), and the path (straight vs bends).
- Vendor spec sheets vary in quality—if clarity is mission-critical, validate with a real-world test.
Handling & Environment Notes
Even a perfect image is useless if you can’t steer the probe—or if “waterproof” turns out to apply only to part of the device. A few practical checks will prevent frustration and premature failures.
Key points:
- Longer cables increase reach but can reduce control, especially through bends.
- “Waterproof” is often scoped (for example, probe tip vs connector), so treat water exposure as a boundary to verify.
- Accessories can help in simple cases, but the fundamentals are still fit (diameter) + control (cable stiffness) + lighting.
Boundary conditions:
- Tight bends, slippery surfaces, and vibration make cable control harder.
- Cleaning methods should match the vendor’s documentation; avoid assuming aggressive chemicals are safe.
Cable length & stiffness: reach vs steerability
Choose cable properties based on the inspection path: straight access can tolerate softer cables, while bends and precise aiming benefit from semi-rigid control.
Quick guidance:
- Choose shorter/less flexible when you need accurate aiming and stable framing.
- Choose longer when reach is the constraint and the path is relatively open.
- If you often inspect through bends, stiffness can matter more than raw cable length.
Boundary conditions:
- If you can’t aim the tip consistently, image specs won’t rescue the result.
Waterproof claims: what’s usually sealed (and what’s not)
“Waterproof” often applies to the probe head, not necessarily the connector and the cable junction. The safest approach is to assume connectors are not waterproof unless clearly stated.
Practical do/don’t:
- Do verify which parts are rated for water exposure (probe tip vs full cable vs connector).
- Do keep connectors dry and clean; moisture at the connector can cause intermittent failures.
- Don’t submerge the connector end unless the vendor explicitly says it is rated for that use.
Boundary conditions:
- Water exposure in real environments often includes oils, soaps, and particles; “waterproof” alone doesn’t imply chemical resistance.
Terminology: Borescope vs Endoscope (and Why “Medical Endoscope” Is Different)
In consumer and industrial inspection, “borescope,” “endoscope,” and “inspection camera” are often used interchangeably; what matters is the form factor (probe camera) and the connection method (USB/Wi-Fi). “Medical endoscope,” however, is a different category with its own requirements and regulations.
Key points:
- Borescope: commonly used in automotive/mechanical inspection language.
- Endoscope: common umbrella term for probe cameras in listings.
- Inspection camera: practical category term that often includes both.
- Medical endoscope: specialized medical device category; if your use is clinical, consult appropriate professionals and standards.
Boundary conditions:
- Don’t rely on the term alone; verify the connection method, diameter, and supported devices.
OEM Sourcing Box: How to Design a Truly Plug-and-Play Experience
A “plug-and-play” user experience is designed, not wished into existence. For OEM teams, the most reliable path is to define target host devices, standard behaviors (like UVC for USB video), connector strategy, and a simple setup guide—then validate with a device test matrix.

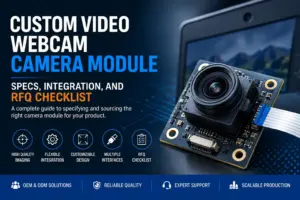
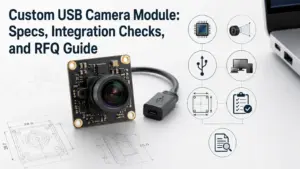
OEM requirements checklist (practical, supplier-ready):
- Target hosts: list the exact device classes you must support (Android models, iPad models, Windows versions, etc.).
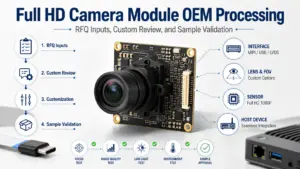
- Interface decision: USB (often easiest for PCs) vs embedded interfaces (like MIPI) depending on your product architecture and cable/latency needs.
- UVC behavior (for USB cameras): aim for standard compliance and predictable enumeration so you can reduce custom driver work on PCs.
- Connector strategy: define USB-C vs other connectors, and specify approved adapters/cables for your kit (treat adapters as part of the product).
- App strategy: decide whether you rely on a vendor app, a standard viewer, or your own app; document the permission flow clearly.
- Mechanical constraints: probe diameter, cable stiffness, housing, LED placement, and thermal/power limits.
- Documentation: one-page “first use” setup and a short troubleshooting tree (the same issues your customers will hit).
- Validation: build a minimal test matrix across the exact devices you’ll ship against (not just “Android in general”).
Validation steps (fast, high-leverage):
- Test on at least two Android models with different manufacturers and OS versions.
- Test on a Windows PC and confirm stable detection over repeated plug/unplug cycles.
- Test your included adapters/cables (don’t assume third-party accessories behave the same).
- Run a basic “no image” troubleshooting script and confirm your documentation resolves it.
Boundary conditions:
- “Works on our bench phone” is not the same as “works for customers”; host diversity is the real risk driver.
- Supplier capabilities vary; confirm support scope (hardware, firmware, driver/app support) per project.
If you’re sourcing a camera module or building an inspection camera product at volume, it helps to start with a short requirements brief: target hosts, probe diameter, working distance, LED needs, and your preferred interface (USB/MIPI, etc.). Supertek builds customized camera modules and can review these constraints with your team to suggest a practical integration path. Learn more at https://www.supertekmodule.com/.
FAQ
- Q: What does “plug-and-play endoscope camera” mean in practice?
A: It usually means you can connect the camera and view a live feed with minimal setup, but it does not mean it will work on every phone or that you won’t need an app. On phones, a viewer app and a USB permission prompt are common. Always verify device support and adapter requirements before buying. - Q: Will a plug-and-play endoscope camera work with my Android phone, iPhone/iPad, or PC?
A: It depends on the host device and the camera’s connection method (USB vs Wi-Fi) and standards support (like UVC for USB video). Android USB setups often require OTG/USB host support and a viewer app; PCs commonly work best with UVC devices. iPhone/iPad support is frequently product-specific, so confirm the vendor’s supported setup rather than assuming. - Q: What is OTG/USB host mode, and do I need it for a USB endoscope camera?
A: USB host/OTG mode means your phone can act as the USB host, power the connection, and enumerate connected USB devices—so yes, it’s typically required for USB endoscope cameras on Android. Without USB host capability, the camera may never appear to the phone, even if the LEDs turn on. If you’re unsure, verify OTG/USB host support for your exact phone model. - Q: What is UVC support and why do endoscope apps mention it?
A: UVC (USB Video Class) is a standard way for USB cameras to present video over USB so host software can access it more predictably. Apps mention UVC because many USB endoscopes rely on UVC behavior for the viewer app to pull the live stream. UVC improves compatibility, but it doesn’t guarantee every app or phone will work the same way. - Q: How do I connect a USB endoscope camera to my Android phone (step-by-step)?
A: Connect the camera through a data-capable OTG adapter, open a viewer app, accept the USB permission prompt, select the USB camera device, and start the preview. If you don’t see a permission prompt, swap the adapter/cable first and then try another viewer app. Testing on a PC can quickly confirm whether the camera itself is working. - Q: Why doesn’t my phone detect the endoscope camera (no image / black screen)?
A: The most common causes are missing OTG/USB host support, a charge-only or low-quality adapter/cable, or an app that can’t access the UVC stream on your device. Try a known-good OTG adapter, a different viewer app, and a direct connection without hubs/extensions. If it works on a Windows PC but not on your phone, the issue is likely phone-side (OTG/app/adapter). - Q: Which specs matter most for inspection clarity (besides resolution)?
A: Working distance/focus behavior, lighting control (to avoid glare), and FOV usually matter more than headline resolution for real inspections. Probe diameter and cable stiffness determine whether you can reach and aim the camera effectively. Choose specs based on your typical inspection distance and environment rather than “highest pixels.”
Summary: What to Check Before You Buy (and When to Escalate)
If you want “plug-and-play” to feel real, treat compatibility and adapters as the first-class requirements, then worry about image specs.
Key takeaways:
- Start with the host device: Android/iPhone/iPad/PC/Mac have different “easy paths.”
- For Android USB endoscopes, verify OTG/USB host support and prefer UVC-compliant cameras.
- Treat adapters/cables as part of the product—many “no image” failures are adapter-related.
- Choose USB vs Wi-Fi based on which setup friction you can tolerate for your device and workflow.
- For image usefulness, prioritize working distance, lighting control, and FOV over headline resolution.
When to escalate (scenario-based):
- If you’re deploying across many device models, build a simple test matrix and validate before scaling.
- If your product needs a specific form factor (diameter, cable behavior, housing) or consistent camera behavior across hosts, define requirements and engage a camera module supplier early.
For teams moving from a prototype to a product, a short requirements checklist (target hosts, interface, working distance, diameter, and app strategy) can prevent months of rework. If you want to discuss a custom camera module approach, Supertek can help evaluate the interface and integration trade-offs at https://www.supertekmodule.com/.