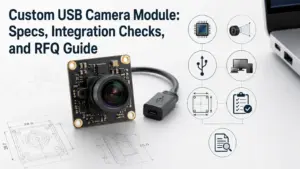
Choose the right USB endoscope camera and confirm it will show video
A USB endoscope camera works reliably only when you verify host support (OTG/USB host mode), UVC video, and the viewing app/software together—not as separate guesses. Use this fast checklist to prevent the two most common surprises: “it powers on but shows no video,” and “USB-C means it will work.”

Fast checklist:
- Decide buy vs build: retail borescope for quick inspection, or an OEM module/custom assembly to fit a product enclosure.
- Confirm host capability: your phone/tablet must support USB host mode (often called OTG), and your PC must allow camera access.
- Assume “UVC” is necessary, not sufficient: UVC helps the device show up as a camera, but preview still depends on formats and apps.
- Use the right adapter path: a USB-C connector does not automatically mean the device can host a camera; poor hubs can break power/bandwidth.
- Pick specs from the job: set working distance and access diameter first; optics + lighting matter more than marketing “resolution.”
| Gate | What to check | Quick test |
|---|---|---|
| Host mode | Phone/tablet can act as USB host (OTG) | Plug in a known USB device via OTG adapter (keyboard/mouse) |
| UVC video | Camera presents itself as a standard USB video device | Check if it appears as a camera on a PC |
| Viewer app/software | Your OS/app can open the stream | Try a different viewer/camera app if “black screen” |
| Stream formats | App supports what the camera outputs (often MJPEG/YUYV) | If detected but no video, suspect format/app mismatch |
| Real-use visibility | Working distance + lighting are adequate | Test on your actual target surface and distance |
Boundary conditions (read before you buy):
- “Compatible” claims vary by host device, OS version, adapters, and the viewing app—verify on your target setup.
- “Waterproof” is meaningful only with stated test conditions (and may not cover oils/cleaners or repeated flexing).
If you’re unsure whether you’re shopping for a finished inspection tool or specifying a component for product integration, the comparison below makes the decision clearer.
USB endoscope camera vs endoscope camera module: when to buy a borescope vs build an OEM solution
A USB endoscope camera (often sold as a borescope) is a finished accessory meant to be plugged into a phone/PC for inspection, while an endoscope camera module is a component (or subassembly) designed to fit your product’s mechanical envelope, cable routing, and validation requirements.
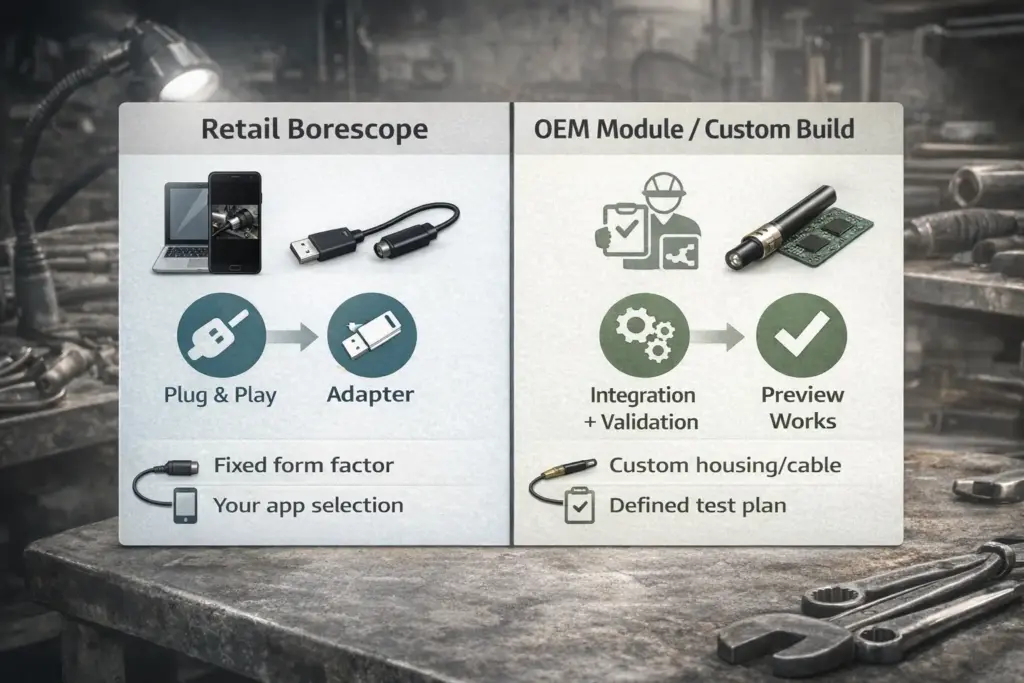
| Topic | Retail borescope / finished endoscope | Endoscope camera module / OEM custom build |
|---|---|---|
| Primary goal | Fast inspection / “works out of the box” | Fits your device and passes your validation plan |
| Form factor | Fixed diameter/cable/handle | Diameter, housing, cable, connector can be specified |
| Host targets | Usually phone/PC | Your defined host matrix (phones/tablets/PCs/embedded gateways) |
| Who handles integration | You choose app/software and adapters | Supplier + you define descriptors, formats, test matrix, documentation |
| What you can verify | “Does it show video on my device?” | Compatibility + reliability + environment + acceptance criteria |
| Best for | Maintenance, DIY, quick checks | Products, regulated environments, long-term reliability needs |
Choose a retail borescope if:
- You only need a quick inspection tool and can accept “works on my device” testing.
- Diameter, cable length, and tip geometry don’t need to match a tight enclosure.
- Environmental exposure is mild (no harsh chemicals/cleaning cycles) and you can tolerate higher variability.
Choose an OEM module/custom build if:
- You must meet a defined diameter, bend radius, mounting interface, or custom cable/connector.
- You need predictable behavior across a target host list (and want to reduce support tickets and returns).
- You must validate sealing, flex life, EMI behavior, or cleaning/chemical exposure with documented criteria.
Boundary conditions:
- The more your requirements look like “must fit” and “must pass,” the less a retail device is a safe shortcut.
- Host devices (phone vs PC vs embedded) change what “compatible” means in practice.
Once you know which path you’re on, the next key concept is UVC—because it explains why a camera can be detected yet still fail to show video.
UVC compatibility explained: What it usually enables—and what it doesn’t guarantee
UVC (USB Video Class) is a USB standard for video devices that helps many operating systems treat a camera as a “class” device instead of requiring a custom driver. In practice, UVC can make a USB endoscope camera easier to recognize—but it doesn’t guarantee your app can open the stream.
Helpful references:
- USB-IF UVC document library: https://www.usb.org/document-library/video-class-v15-document-set
- Windows UVC driver overview (inbox driver behavior): https://learn.microsoft.com/en-us/windows-hardware/drivers/stream/usb-video-class-driver-overview
What UVC often enables:
- Your device appears as a camera on many systems that ship a UVC class driver.
- Standard camera viewers can often enumerate the device without vendor installers.
- For OEMs, a predictable framework for descriptors and streaming controls.
What UVC does not guarantee:
- Your chosen app supports the camera’s output format (common examples are MJPEG and YUYV).
- Your host allows camera access (privacy permissions or corporate policies can block it).
- Your adapter/hub provides stable power and bandwidth for the negotiated mode.
Practical “verify anyway” checklist:
- Test at least two viewers/apps on the same host (to separate “app limitation” from “camera problem”).
- Confirm the camera exposes a format your viewer supports (format mismatch can look like a black screen).
- Avoid the weakest link in the chain: questionable USB-C hubs, long unshielded cables, or low-power ports.
Boundary conditions:
- Android devices vary more than PCs in how reliably they handle USB host mode and camera apps.
- “Detected” is only enumeration; “preview works” requires format + app + permissions.
With UVC clarified, the quickest win is a structured Android check—because OTG/host mode is the gate that breaks most phone use cases.
Android quick check: OTG + UVC compatibility before you buy (or before you lock a design)
An Android phone/tablet can only show a USB endoscope camera if it can act as a USB host (often called OTG) and your camera stream can be opened by an Android viewer app. Treat it as a short verification workflow, not a single “compatible” label.
Android’s official overview of USB host mode: https://developer.android.com/develop/connectivity/usb/host

Step-by-step verification (6–8 steps):
- Confirm host mode capability: verify your device supports USB host mode (OTG) and that OTG is enabled if your device has a toggle.
- Use a known-good OTG adapter: prefer a simple OTG adapter over multiport hubs for first tests.
- Connect the camera and watch for enumeration: if the endoscope powers but nothing appears, suspect host mode/adapter first.
- Open a UVC-capable viewer app (generic): avoid assuming the stock camera app will see external USB cameras.
- Grant permissions: allow USB device access if prompted; check Android privacy settings if the app shows “camera blocked.”
- If you see a black screen, change the approach (not just the cable): try another viewer app to rule out format support limits.
- Test at your real working distance and lighting: verify you can actually see the target surface, not just “a picture.”
Fast triage: “LEDs on, but no video”
- Likely host/adapter issue: phone doesn’t supply host mode, or adapter isn’t OTG-capable.
- Likely app/format issue: camera is detected but the viewer can’t decode the negotiated stream format.
- Likely power/bandwidth issue: hubs or long adapters cause unstable negotiation; try a simpler adapter and a different port/device.
Boundary conditions:
- USB-C on a phone does not automatically mean it can host a camera reliably; implementation differs by model and firmware.
- App capability varies; “works on one app but not another” often points to format support, not a defective camera.
If Android is your host, you’ve handled the biggest gate; the next misunderstanding is connector-driven—especially around USB-C and iPhone/iPad compatibility.
USB-C and iPhone/iPad realities: why the connector doesn’t guarantee compatibility
A USB-C connector is just a physical interface—it does not guarantee your device will behave as a USB host for a camera, nor that iOS/iPadOS will open a generic USB video stream the same way a PC might. The safest approach is scenario-based verification.
Scenario checklist (no device lists):
- USB-C Android phone/tablet: verify USB host mode (OTG) + use a simple OTG adapter + confirm a UVC-capable viewer can open the feed.
- Android with multiport hubs: test without the hub first; hubs can introduce power and negotiation issues.
- iPhone/iPad: treat “works with iPhone” as a claim that must be validated with the intended adapter/accessory path and an app that supports that hardware.
- USB-A to USB-C adapters: confirm the adapter supports the right role (host/peripheral) for your device; some are charge/data focused, not OTG paths.
Pre-buy verification questions to ask (or test yourself):
- What exact host devices and OS versions were tested (phone/tablet/PC)?
- What adapter path was used (simple OTG adapter vs hub vs powered hub)?
- What app/software was used to preview the feed (and is it required)?
Boundary conditions:
- iOS/iPadOS behavior varies by device generation, adapter, and app/accessory implementation; avoid assuming generic parity with PCs.
- Many “compatibility” returns are really adapter/hub failures—keep the initial test path simple.
Once you’ve handled phone/tablet realities, desktop hosts are usually easier—unless you hit the “detected but black screen” failure mode.
Windows, macOS, and Linux: what software you need—and why ‘detected’ can still show a black screen
On desktop systems, a UVC endoscope camera often appears as a camera device, but preview can still fail if the viewer app can’t open the negotiated format or the OS blocks access. Your goal is to separate enumeration, permissions, and format support.
Windows UVC driver overview (system-supplied driver context): https://learn.microsoft.com/en-us/windows-hardware/drivers/stream/usb-video-class-driver-overview
What you typically need:
- Windows: a camera viewer/capture app (many options exist); if it’s UVC, you often don’t need a vendor driver.
- macOS: a camera viewer app that can select external cameras (and has permission).
- Linux: a viewer that supports V4L2 devices; ensure the device node is accessible and permissions allow camera use.
| Symptom | Most likely cause | What to try first |
|---|---|---|
| Camera appears in device list, but preview is black | Viewer app can’t open the stream format | Try a different viewer app; check if another format is available |
| Camera never appears | Cable/port/adapter issue or host restrictions | Try another port/cable; avoid hubs; test on another computer |
| App sees camera, then disconnects | Power/bandwidth instability | Use a direct port; avoid bus-powered hubs; shorten the chain |
| App says “camera blocked” | OS privacy/corporate policy | Grant camera permission; test with a personal device |
Boundary conditions:
- Privacy settings (especially on managed devices) can look like a “camera problem.”
- App capability varies; switching apps is a valid diagnostic step, not a workaround.
With compatibility basics covered, the next win is choosing specs from real use constraints—because many disappointments come from “spec-sheet thinking” rather than working distance and lighting.
Spec checklist that actually matters: Diameter, working distance, FOV/DOF, lighting, cable, sealing
The specs that matter most are the ones that decide whether you can actually see your target at the required distance and access diameter—working distance + optics + lighting usually dominate “usable detail” more than a headline resolution number.

| Spec | What it changes in real use | How to choose | What to ask a supplier |
|---|---|---|---|
| Probe diameter | Where it can physically fit | Start from the tightest access point | Max OD, tip shape, bend radius |
| Working distance | Whether the target is in focus | Define your typical inspection distance | Focus target range, sample images at that distance |
| FOV | How much you see vs distortion | Wider isn’t always better in tight spaces | FOV at working distance, distortion expectations |
| DOF | How forgiving focus is across depth | Match to how close/far your target varies | DOF behavior at the chosen lens/focus setup |
| Illumination (LEDs/dimming) | Glare, shadow, noise | Reflective surfaces need controllable lighting | LED placement, dimming control, glare mitigation |
| Cable rigidity/length | Positioning stability and dropouts | Longer and thinner tends to be harder | Cable type, shielding, strain relief, flex expectations |
| Output formats | Whether apps can preview reliably | Prefer formats widely supported by your host apps | Supported formats, how they’re selected/negotiated |
| Sealing / “waterproof” | Whether it survives exposure | Define your real exposure (water vs oils/cleaners) | Test conditions, acceptance criteria, lifecycle assumptions |
Supplier questions that prevent “good on paper, bad in use”:
- What working distance was the lens tuned for, and do you have sample images at that distance?
- How is lighting controlled (dimming steps, heat considerations, glare behavior on reflective surfaces)?
- What stream formats are supported, and what hosts/apps were validated?
- What cable construction and strain relief is used for repeated flexing?
- If “waterproof” is claimed, what test method and conditions were used (and what is excluded)?
Boundary conditions:
- Tight diameters often force optics and lighting compromises; plan for sample testing instead of relying on labels.
- A “higher resolution” claim won’t fix poor lighting, glare, or an unsuitable working distance.
What affects image clarity besides resolution (a practical mental model)
If two endoscope cameras share the same “resolution,” the clearer one is usually the one with better optics + lighting + stability at your working distance. Think in terms of usable detail, not pixels.
Key drivers of usable detail:
- Lens + focus target: determines sharpness at the distance you actually use.
- Lighting control: prevents glare and reduces noise by giving the sensor enough light.
- Sensor behavior + processing: affects low light, color, and noise; results vary by implementation.
- Mechanical stability: wobble and motion blur can dominate detail in tight spaces.
- Surface reflectivity: shiny targets often require dimming or angled lighting to reduce hotspots.
Boundary conditions:
- Reflective surfaces can look worse with “more LEDs” if you can’t dim or control glare.
- The safest way to set expectations is to validate with samples under your real lighting and distance.
Once you know the target specs and the “usable detail” model, OEM teams can move faster by sending suppliers a requirement package that is actually buildable and testable.
OEM/custom build checklist: What to send a supplier (requirements → design levers → validation plan)
If you’re integrating a USB endoscope camera into a product, the fastest path is to send a supplier a requirements checklist plus a small validation plan—so you’re not iterating blind on diameter, optics, cable routing, and host behavior.
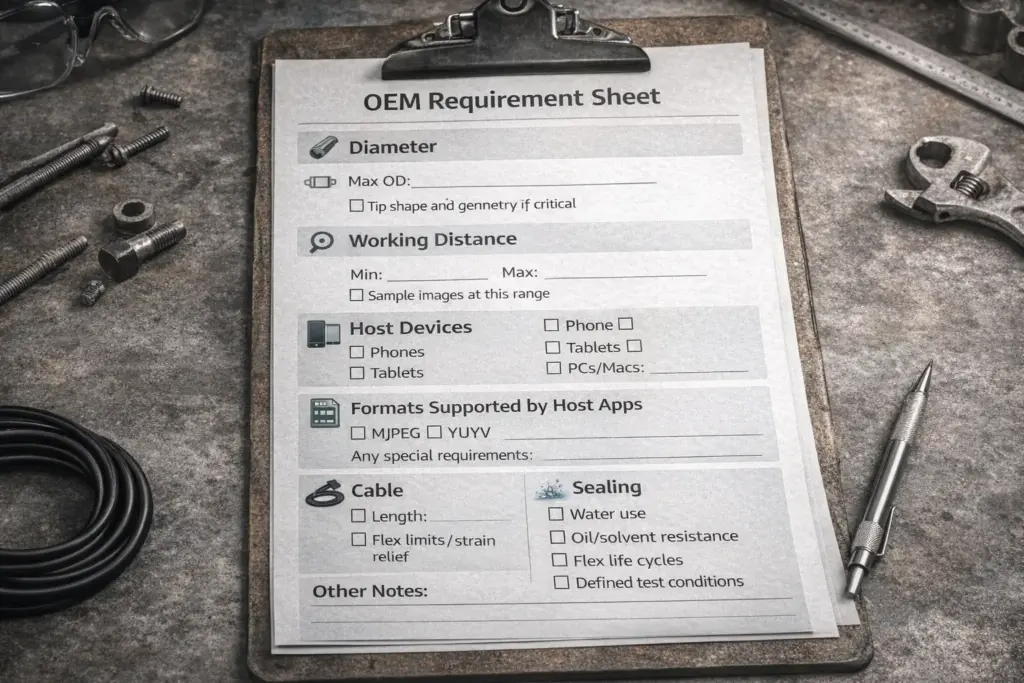
OEM intake checklist (copy/paste into your RFQ):
- Target use case and environment (water vs oils/cleaners, temperature range, cleaning method).
- Maximum probe diameter and tip geometry constraints.
- Typical working distance(s) and what must be readable/visible at that distance.
- Desired FOV and any distortion constraints (if relevant to interpretation).
- Lighting requirements (dimming, glare expectations, reflective surfaces).
- Cable length, rigidity, and routing constraints (bend radius, strain relief).
- Connector and mechanical interface requirements (mounting, sealing interface).
- Target host devices and OS versions (your actual test matrix).
- Preferred output formats and any app/software constraints on the host side.
- Power constraints (especially if the host is a phone/tablet or a low-power port).
- Reliability expectations (flex life, drop resistance, sealing lifecycle assumptions).
- Documentation needs (datasheet, revision control, acceptance criteria, test report summary).
| Requirement | Typical design lever | What you validate |
|---|---|---|
| Tight diameter | Housing + lens choice + LED placement | Fit check + image at working distance |
| Reflective target surfaces | Dimming + lighting angle | Glare behavior and readability |
| Long cable | Shielding + strain relief | Dropouts, artifacts, flex stress |
| Multi-host support | Format set + descriptors | Open/preview on each target host/app |
| Wet/dirty environment | Seals + materials | Test per defined conditions + post-test inspection |
Boundary conditions:
- Feasible customization depends on the mechanical envelope, cable routing, and what your target hosts can reliably open.
- Validation scope depends on environment severity and your risk tolerance; define pass/fail criteria early.
If you’re sourcing for an OEM project, you’ll get faster, cleaner quotes by sharing your diameter, working distance, target hosts, and exposure conditions up front—then asking for a sample plan that matches that matrix.
After requirements are defined, the most expensive surprises usually come from sealing claims and long-cable stability—so it’s worth running a short risk check before committing.
Risk checks before you commit: Waterproof/sealing claims, long cables, power, bandwidth, and EMI
Most “it failed in the field” problems come from unstated test conditions (sealing) or unstable links (power, bandwidth, long cables). Treat these as verification checklists, not marketing claims.
Ingress Protection (IP) ratings overview (IEC): https://www.iec.ch/ip-ratings

Sealing / “waterproof” checklist (what to request)
- Test conditions: exposure type (water spray/immersion), duration, temperature, and whether the camera was flexed/handled during testing.
- Acceptance criteria: what counts as failure (ingress, fogging, corrosion, image loss) and what inspection was done after the test.
- Exclusions: oils, solvents, high-pressure washdown, repeated cleaning, or abrasion may not be covered by water-only tests.
- Lifecycle expectation: sealing can degrade with repeated flexing, cable strain, and wear at interfaces—clarify what was validated.
Long-cable / stability checklist (what to validate)
- Power stability: test on your weakest host port (phones/tablets and bus-powered hubs are common constraints).
- Bandwidth headroom: if higher resolution modes are unstable, validate a fallback mode that stays reliable.
- EMI behavior: long cables can pick up noise; shielding and grounding strategy matter in industrial environments.
- Dropout triage: separate “format/app issue” from “link stability issue” by testing on a known-good PC and a short cable chain first.
Boundary conditions:
- A label like “IPxx” or “waterproof” is only meaningful with a defined method and pass/fail criteria.
- Cable construction differs by model and supplier; don’t assume stability without testing on your actual routing and enclosure.
If you turn those risks into a minimal validation matrix, you can quickly confirm whether a camera is “good enough to scale” before you buy in volume or freeze a design.
Minimum validation checklist: The fastest tests to prove the camera works in your real use case
A short validation matrix—hosts × adapters × environment × working distance—beats guessing. The goal is to confirm (1) preview works reliably, (2) image is usable at real distance/lighting, and (3) the assembly survives your exposure assumptions.
| Test | What you do | Pass criteria (example-style, not universal) | Notes |
|---|---|---|---|
| Host matrix | Try each target phone/tablet/PC | Opens preview consistently | Track OS/app versions |
| Adapter chain | Test your actual OTG/USB-C path | No disconnects or “black screen” | Avoid hubs in baseline |
| Format fallback | Switch to alternate supported mode if available | Stable preview under normal handling | Useful for constrained hosts |
| Working distance | Inspect your target at real distance | Target feature is clearly visible | Repeat on reflective surfaces |
| Exposure sanity check | Test with your expected exposure type | No fogging/ingress symptoms | Define method + inspection |
| Flex/strain check | Bend/route cable as in the product | No intermittent signal | Pay attention to strain relief |
Fast execution plan (6 steps):
- List your target hosts and the exact adapter path you’ll ship/support.
- Confirm preview opens on each host with the baseline cable chain (no hubs).
- Validate a stable fallback mode if your primary mode is marginal on weaker hosts.
- Test visibility at your real working distance with your real lighting and surface type.
- Run a minimal exposure check that matches your environment assumptions.
- Record outcomes as pass/fail with notes; use that as acceptance criteria with suppliers.
Boundary conditions:
- “It works on my desk” doesn’t predict field stability—test on the actual host(s) and adapter chain you will support.
- Avoid relying on marketing labels; define what “works” means for your use case (visibility, stability, survivability).
With the verification and selection framework set, the FAQ below answers the most common short questions in a format that’s easy to share internally.
FAQ
Q: What is a USB endoscope camera, and how is it different from an endoscope camera module?
A: A USB endoscope camera is usually a finished inspection accessory (borescope), while an endoscope camera module is a component/custom subassembly meant to fit your product. A retail device optimizes for quick use, while an OEM build optimizes for mechanical fit, host compatibility, and a defined validation plan.
Q: What does “UVC compatible” mean, and do you need drivers?
A: UVC compatible means the camera follows the USB Video Class standard, which often lets systems use a built-in class driver instead of a vendor driver. You may still need the right viewer app/software, and preview can fail if formats or permissions don’t match.
Q: How do I check if my Android phone supports OTG for a USB endoscope camera?
A: You check OTG/USB host mode by using a known-good OTG adapter and confirming the phone can enumerate a USB device. Then confirm a UVC-capable viewer app can open the camera stream. If it powers but shows no video, suspect adapter/host mode or app/format mismatch.
Q: Why is the endoscope detected as a camera but shows a black screen (no video)?
A: A black screen usually means the viewer app can’t open the negotiated stream (format support or permissions), even though the device enumerated correctly. Try a different viewer app, check camera permissions, and simplify the cable/adapter chain to rule out power/bandwidth instability.
Q: What specs matter most when choosing a USB endoscope camera (diameter, DOF/FOV, lighting, cable, sealing)?
A: The most important specs are the ones that determine real-use visibility at your access diameter and working distance. Set diameter and working distance first, then match FOV/DOF and controllable lighting, and finally confirm cable stability and sealing with defined test conditions.
Q: Will a USB endoscope camera work with Android and iPhone, and what adapters matter?
A: It can, but only if the host device supports the required connection role and the viewing path is validated with the right adapter/app combination. Use a simple OTG-capable adapter for baseline tests and avoid assuming that USB-C alone guarantees compatibility—especially on iOS/iPadOS where behavior can vary.
Q: How should I evaluate waterproof claims (IP ratings) for an endoscope camera?
A: Treat waterproof/IP claims as meaningful only with stated test conditions and pass/fail criteria. Ask for the exposure method, duration/temperature, post-test inspection method, and what is excluded (like oils, solvents, or repeated cleaning).
Q: What information should I send a supplier to customize a USB endoscope camera module?
A: Send a requirement checklist that includes diameter, working distance, target hosts, output formats, lighting needs, cable routing, and exposure conditions. Add a short validation matrix (hosts × adapters × environment) so the supplier can propose build options and a sample plan that matches your real constraints.
Summary: how to choose, verify compatibility, and move to an OEM-ready spec
A USB endoscope camera is easiest to get right when you treat it as a system (host + adapter + UVC + app/software + formats) and pick specs from working distance and lighting rather than resolution labels alone.
Key takeaways:
- Choose retail borescope vs OEM build based on whether you need “quick inspection” or “fit + validate + support.”
- Verify compatibility with a simple workflow: host mode → UVC recognition → viewer app/software → format support → real-use test.
- Pick specs starting from diameter and working distance, then match optics and controllable lighting to the surface you inspect.
- Treat “waterproof/IP” as test-condition-dependent, and request conditions and acceptance criteria instead of repeating labels.
- For OEM projects, a supplier-ready checklist + validation matrix saves the most time and rework.
Scenario-based next steps:
- If you’re troubleshooting “no video,” simplify the chain (no hubs) and test a second viewer app to isolate format vs link stability.
- If you’re selecting a new camera, define your working distance and reflective surfaces first, then request sample images at that distance.
- If you’re building a product, assemble your host matrix, exposure conditions, and acceptance criteria before requesting quotes or samples.
If you need an OEM-ready recommendation, prepare four inputs—maximum diameter, working distance, target hosts, and exposure conditions—then ask for a sample plan that tests those exact constraints.